While there are many solutions out there by just keying the “SFTP Server” and “SFTP Client” the chance of having the results that leads you to complex system is very high. As consequences, you will lose a lot of time searching for settings up the solutions you’ve found. Imagine that the latter happens when all you want is to transfer files to AWS or Azure VMs securely without needing to do a lot of configuration. With that said, the said problem can be overcome by using Porta SFTP Server and WinSCP SFTP Client.
So, in this post, you will see how to deploy the Porta SFTP Server and use WinSCP as the SFTP Client. This should eliminate some of your headache for transferring your files remotely in secure manner; besides, this solutions is very self-explanatory.
Disclaimer: Although Porta SFTP Server has a Free Edition it is important to note that it is a proprietary software. Additionally, in this demonstration, WinSCP will be used, a opensource SFTP Client to connect to Porta SFTP Server.
Main Points
- Download and Start Porta SFTP Server
- Create Username and Password Credentials
- Connect Porta SFTP Server with WinSCP
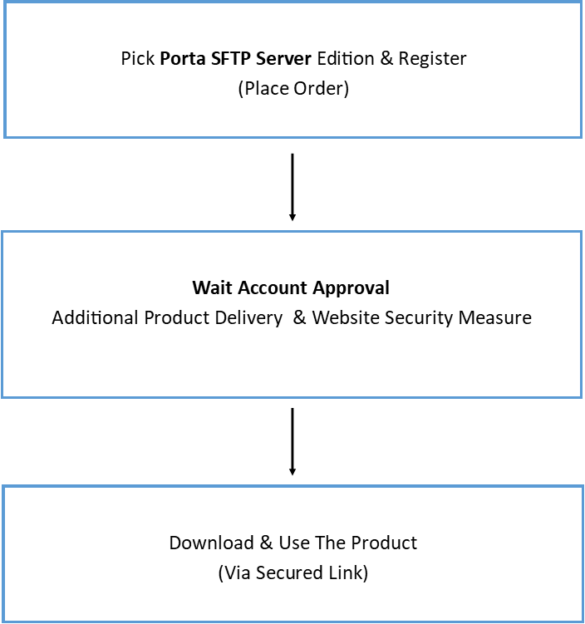
Figure 1
Note. The Porta SFTP Server Free Edition can be used for commercial and non-commercial legal purposes.
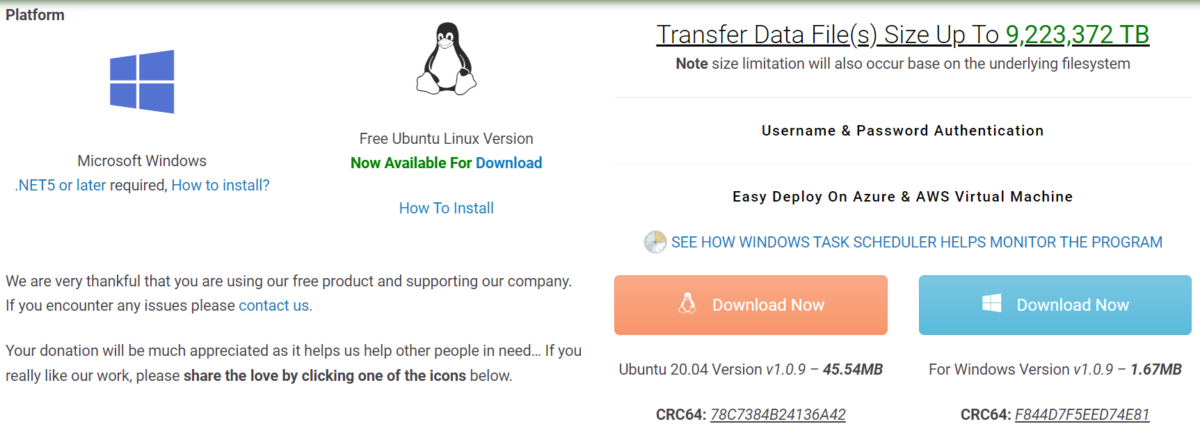
Figure 2
Run/Open Porta SFTP Server

Note. As you can see there is only one file, if it ask you for the firewall prompts click “Allow”. Though, make sure to install the .NET 5 framework prior to running the application. Please read How To Install .NET Runtime In Windows OS – PORTA SFTP SERVER.
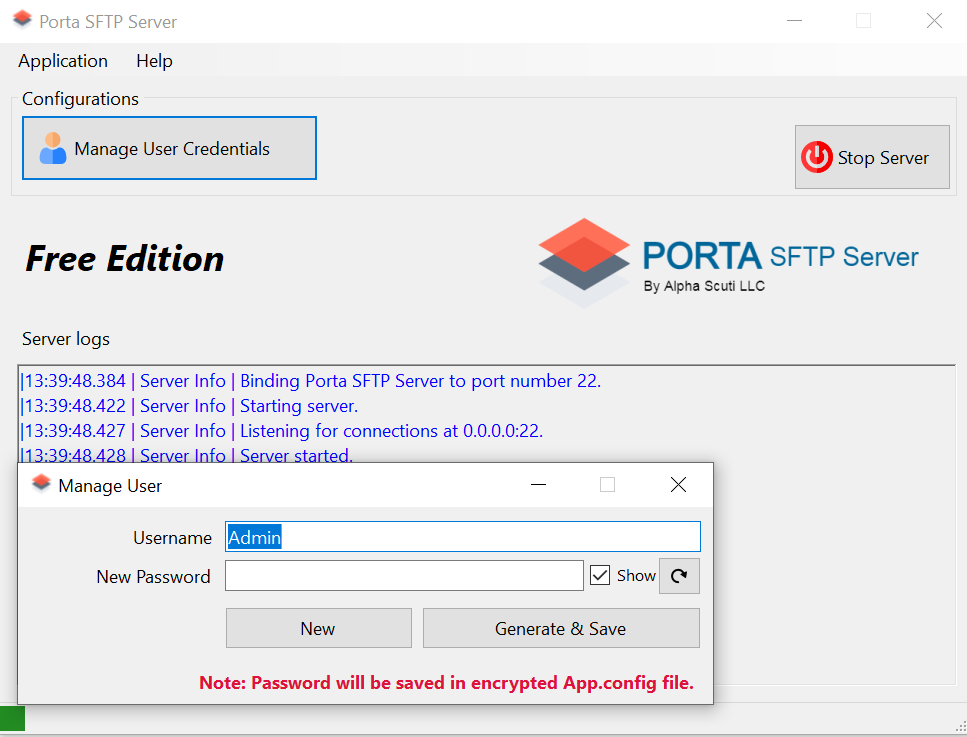
Figure 3
Creating Porta SFTP Server User

Note. This is the username and password to be used from the remote computer using SFTP client e.g WinSCP or FileZilla, and etc… Click the “Generate & Save” button to proceed.
Figure 4
The Running Porta SFTP Server

Note. Upon creating the user and password, the Porta SFTP Server will automatically create the “UserData” folder as the landing directory for the client.
Connecting WinSCP
Figure 5
Setting WinSCP Credentials

Figure 6
Accepting Host Key / Server Connection Confirmation

Note. This confirmation is assurance for you to review the host/server keys e.g the key provided from the third party for the purpose of sharing files. Click “Yes” to proceed in this case, otherwise “No” to reject the connection if not known in real world scenario.
Figure 7
Successful Connection
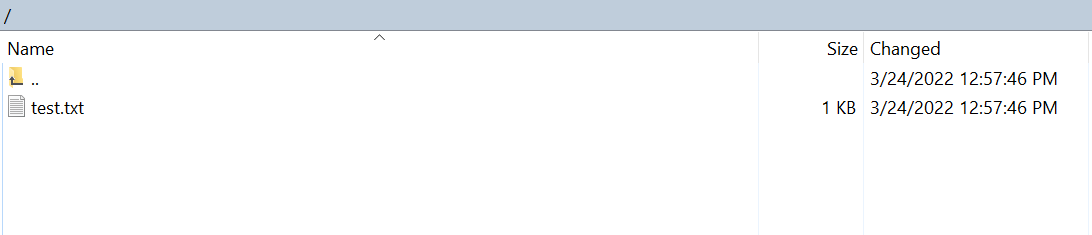
Note. You should see the similar content as Porta SFTP Server will create a sample file under directory “User Data” (Landing page).
Conclusion
To recapitulate this post, you’ve learned how to download, start and connect to Porta SFTP Server Free Edition with the popular SFTP client such as WinSCP to navigate the “UserData” directory. With that said, you can see that the latter is self explanatory and very easy to use. Though, its important to note that if you want to have multiple user credentials to navigate the server files, consider getting one of the other edition that support this functionalities.