Fail2Ban is a software that helps system administrators to block unwanted incoming connections from external hosts. This is triggered when events such as too many authentication failures happen to the SSH/D server. in this post, let’s see how we can take advantage of this functionality that Fail2Ban has by invoking it after host denial from the Porta SFTP Server. This is important because blocking the incoming host at the firewall level increases security as it will not reach the application which prevents intrusion and brute force attack.
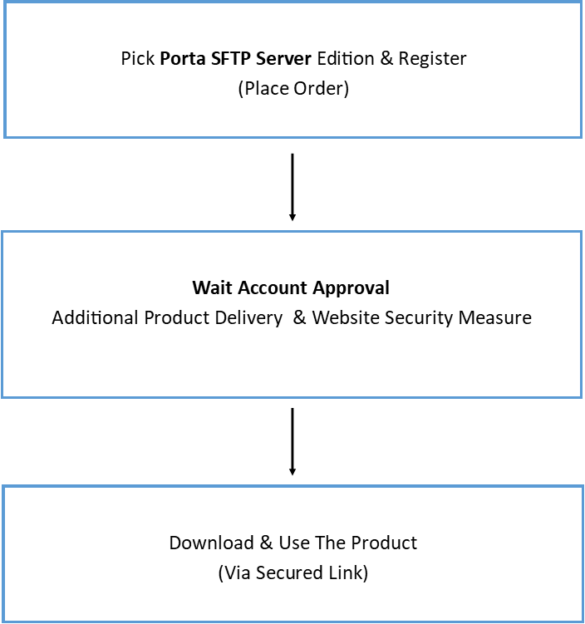
To successfully follow this post, you must have the Porta SFTP Server installed on your machine, otherwise, read the blog how to setup cross platform sftp server.
Installing Fail2Ban
Update the current Linux System
sudo apt updateInstall the Fail2Ban
sudo apt install fail2banCheck Fail2Ban Client Commands
fail2ban-clientYou should see similar to the following explains each commands.
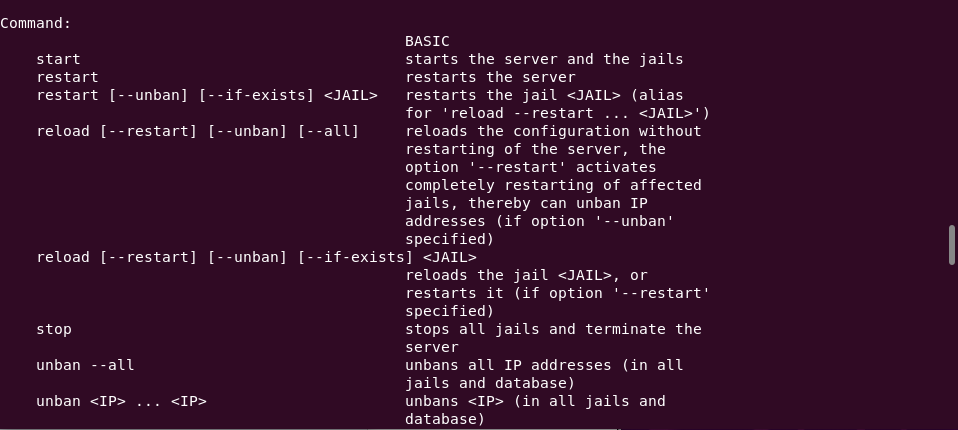
Note. Fail2Ban jail contains a combination of filters, actions, thresholds, etc…
Configuring /etc/sudoers
In order to limit the Porta SFTP Server to communicating only with the Fail2Ban for the sake of banning external host IP addresses, we need to specify this under the /etc/sudoers file. To do so please follow these steps.
sudo nano /etc/sudoersThen type the following at the bottom of the file

Note. Please change the “myusername” with you granted username (login username).
Configure and Run Fail2Ban
If you already have Fail2Ban running please stop it and do the following
cd /etc/fail2banEdit the jail.local by putting the port number that Porta SFTP Server that is using and specify the bantime
sudo nano jail.local
Note. The [sshd] section is nearly towards the bottom and you have to scroll down further.
Finally run the Fail2Ban
sudo systemctl start fail2banYou can check the status by
sudo systemctl status fail2ban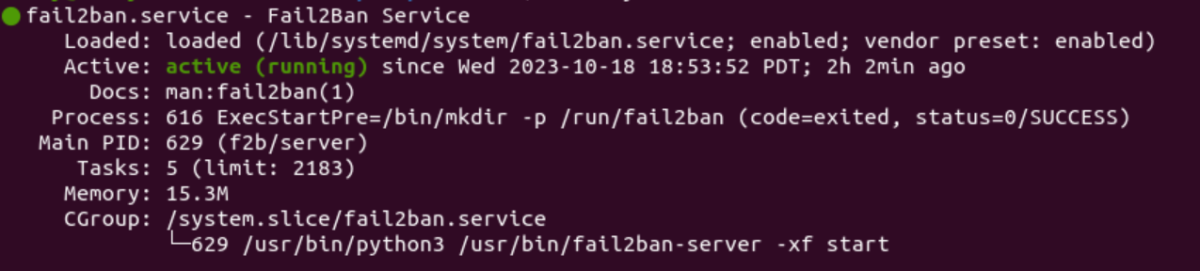
Test With Porta SFTP Server
To test with Porta SFTP Server go to Manage->Bulk IP Address Filtering. From there specify the only allowed IP Address, tick enabled, and tick the Augment with Fail2Ban Intrusion Prevention. Note that the latter is only applicable in Linux.

Note. Spoiler, obviously, to test the banning functionality, you have to try to connect a different computer to the server that is not included in the whitelisted list.
Test Results
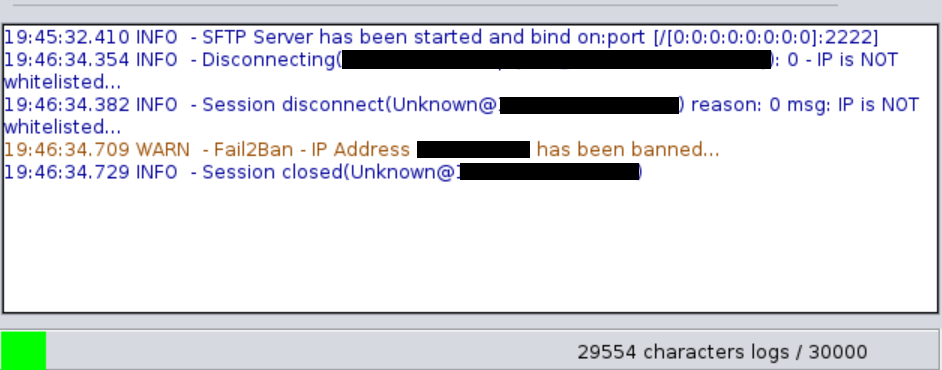
Note. Currently, any IP Address that is not whitelisted will be banned immediately. The attempt failure that you will configure from Fail2ban does not apply yet. The only thing the Porta SFTP Server does is invoke the IP Ban functionality. The banned time will be based on your configuration in Fail2Ban.
Conclusion
As you can see Fail2Ban is great software that can help you secure your SFTP Server. This post explains how the Porta SFTP Server can directly communicate with Fail2Ban and take advantage of its banning functionalities. To explore more about the Fail2Ban please visit its wiki documentation at https://github.com/fail2ban/fail2ban/wiki.