
My name is Harry, I am a tech enthusiast. My primary goal is to help others as they help me, especially in the modern world. In this post, I will explain how to install the Ubuntu Server. In my previous career, I’ve used Windows Server 2019 to host our website using Internet Information Services (IIS) and using SQL Server.
Microsoft published a lot of opensource frameworks and products like ASP.NET CORE/.NET CORE, Blazor, Data Azure Studio, VS code and the lists go on. I primarily use windows platform to developed various website especially to get the benefit of using IIS for hosting the website that I created in .Net. But since .NET Core created everything has changed.
Why I decided to use a Linux Distro
All tools I’ve mentioned above are now opensource except the built-in Microsoft web server IIS. But here it is why I migrated all the websites, databases and host it to Ubuntu Server.
- Cost-efficient (Low cost)
- Large community support, and collaborations
- Performance and Customization
- Reliability, Security, and Privacy; and
- “Fun” and Easy to use.
I assumed you already have
- VMware and Esxi 6.5 accessible in your browser
- Downloaded Ubuntu Server LTS/Normal
- A bit experience in Linux OS
So let’s get started
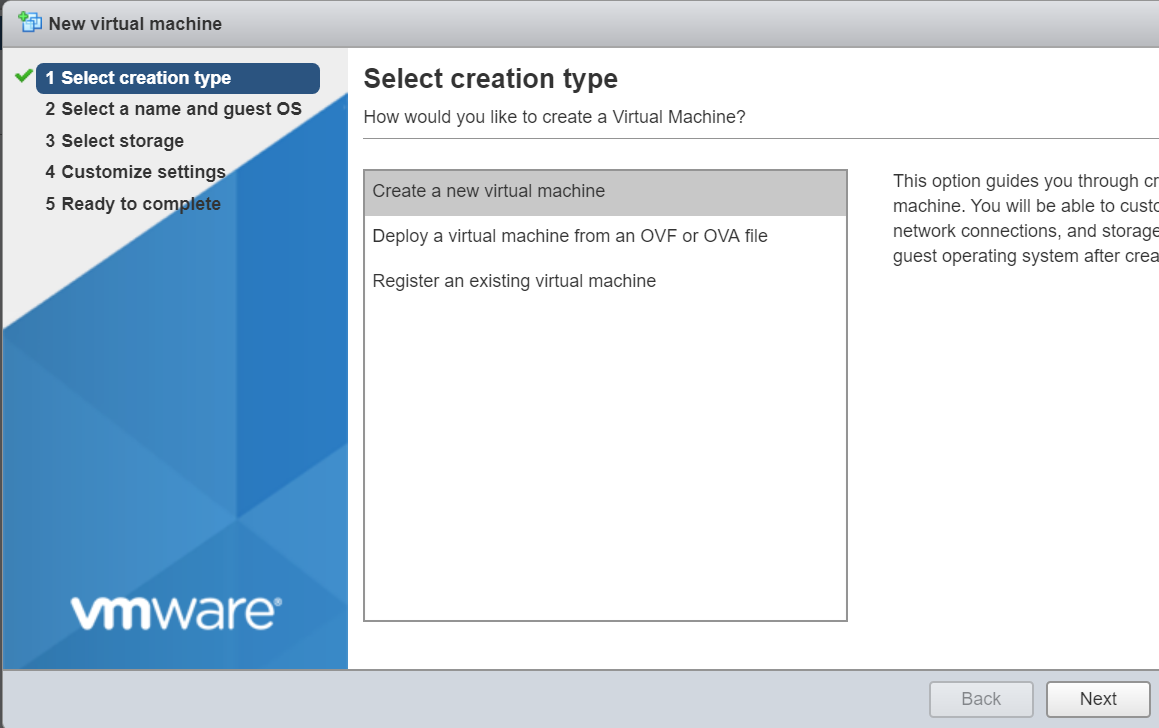
Step 1: Create a new virtual machine
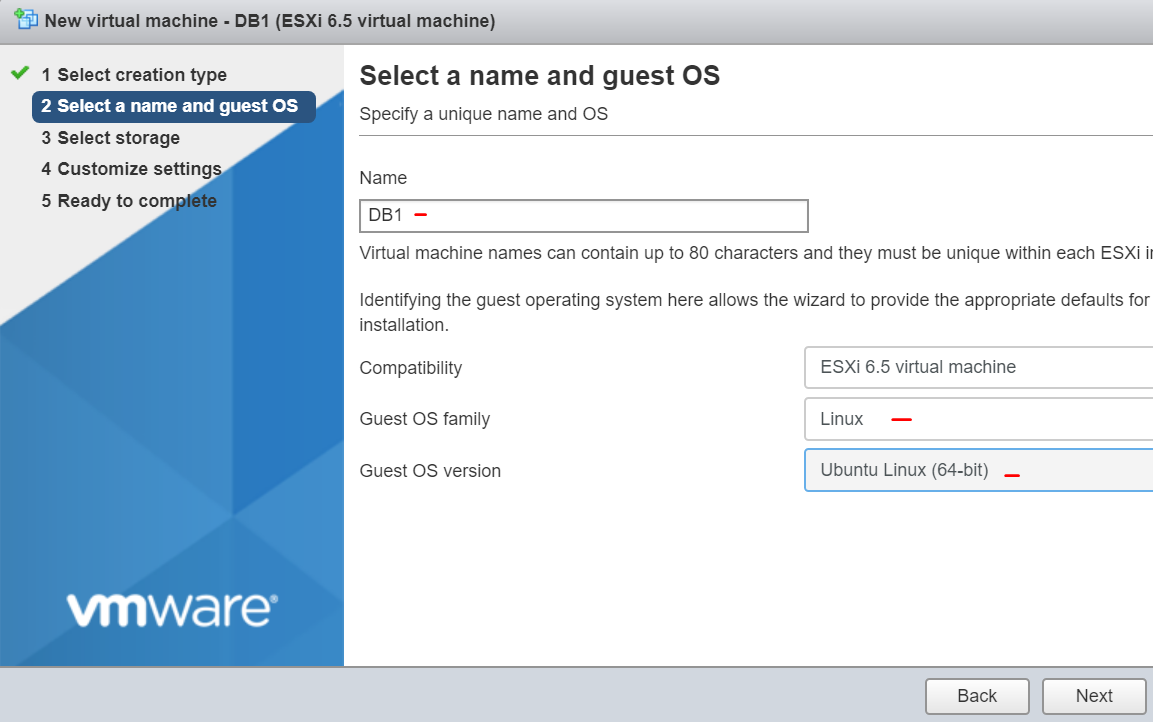
Step 2: Set Server Name, OS and Version
In my case DB1/DBS1 for my Database Server
Step 3: Select your desired Datastore to create Partition

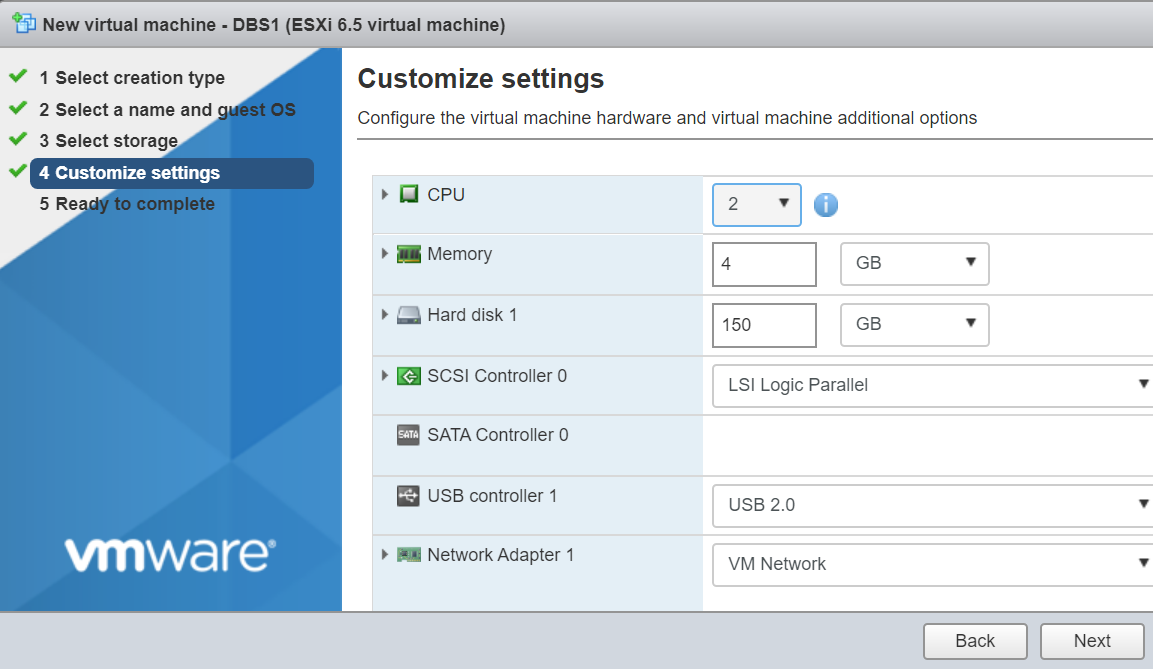
Step 4: Select your desired configurations. See Ubuntu Requirements
- 2 GHz dual-core processor
- 4 GiB RAM (system memory)
- 25 GB of hard-drive space (or USB stick, memory card or external drive but see LiveCD for an alternative approach)
- VGA capable of 1024×768 screen resolution
- Either a CD/DVD drive or a USB port for the installer media
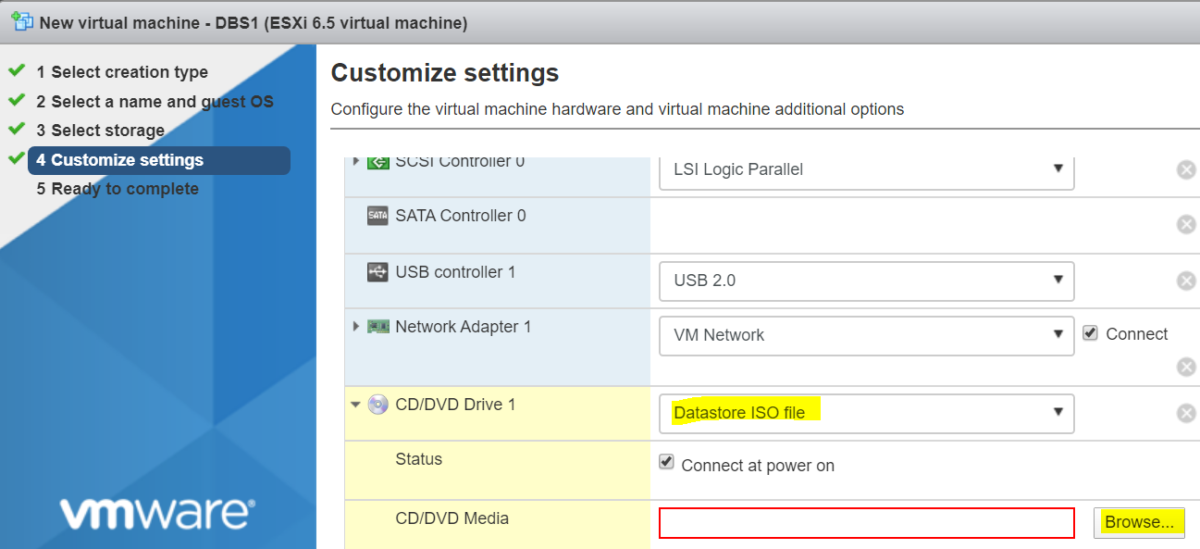
Step 5: Choose ISO, Browse or Upload the Ubuntu ISO file and select as the CD/DVD Media source
Step 6: Review your configuration and click finish
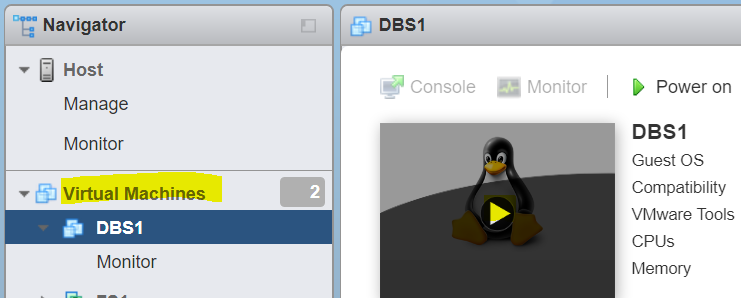
Now, Let’s Install the Ubuntu Server
Step 1: Go on your Virtual Machine (VMS) and select the server
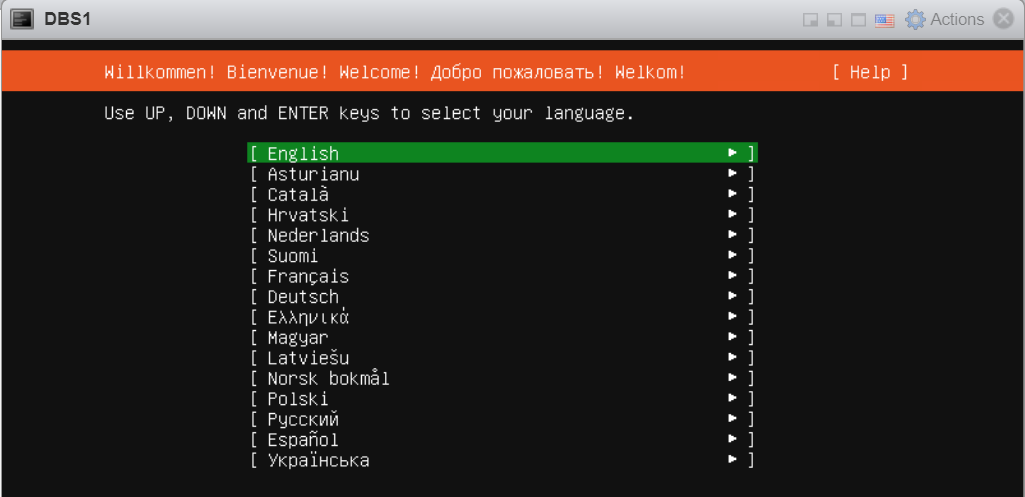
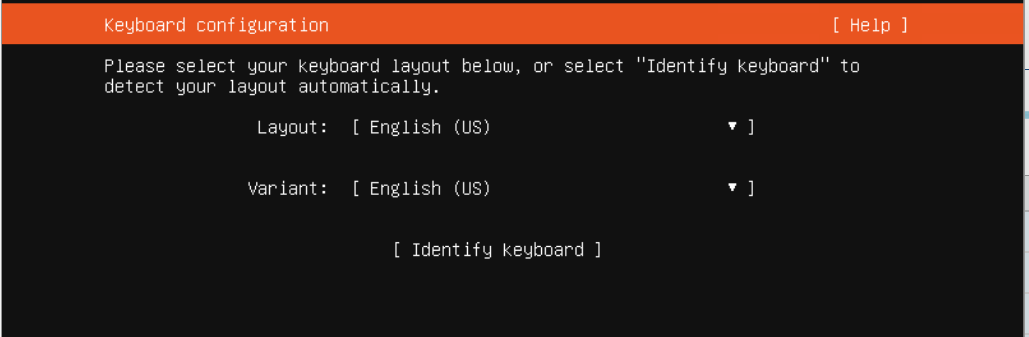
Step 2: Ubuntu installation starts you will be prompt to select a language and to Identify keyboard setup.
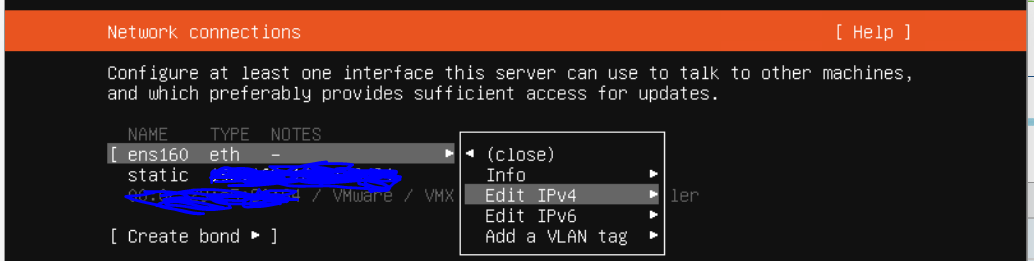
Step 3: Setup a static IP. See reference
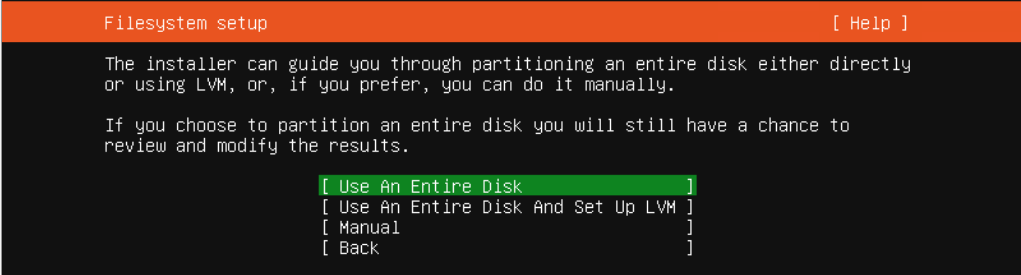
Step 4: Done/Next until you get this wizard and select “Use An Entire Disk”

Step 5: Review the summary and continue

Setting Up Credentials
Step 1: Name, Server Name, Username and Password (Strong One)

Step 2: Enable/Install OpenSSH for secure shell remote connections for future purposes. This will help you with copying files from different OS environments to your Linux Machine securely.

Step 3: Select a few server snaps

Step 4: Begin install
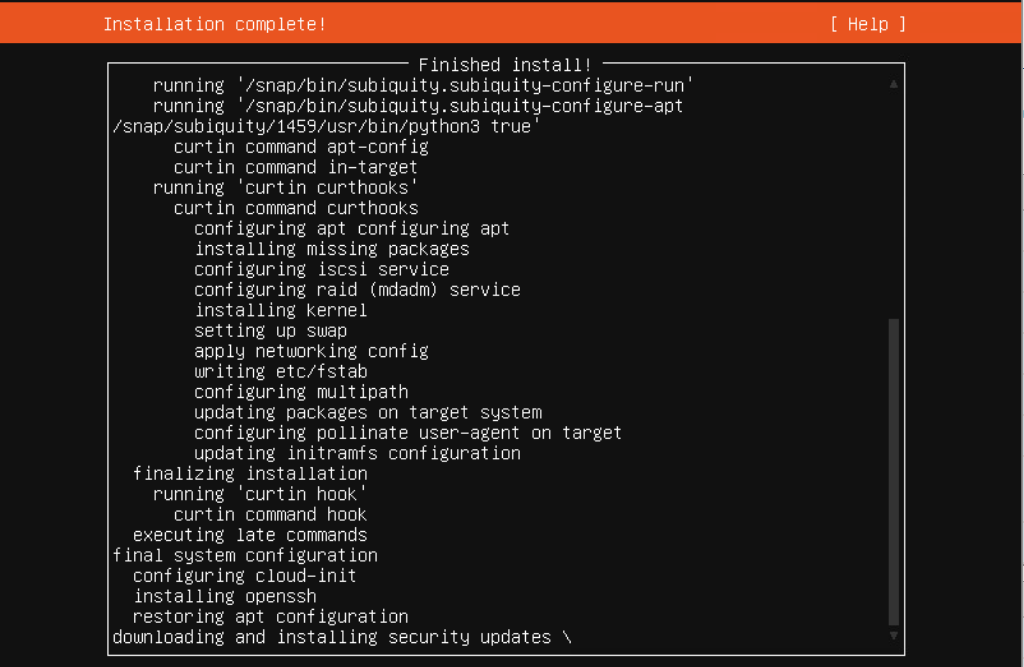
Step 5: After installation, reboot the server, log-in using your credentials and you are done.
Bonus future post
- Enable XRDP for remote desktop
- Install MSSQL in Ubuntu Server